
Making an herb wreath is a fun way to dry culinary herbs. You can either leave the wreath up all winter and pluck leaves here and there for your recipes or after the leaves dry, remove them to airtight containers that you store in a dark cupboard. The second method better protects the flavors, and provided the leaves dry quickly, you can make several wreaths before winter hits.
How to Make a Culinary Herb Wreath
Step One: Gather Your Supplies

Wreath Form
Start by gathering your supplies. A straw or grapevine wreath form looks best with herbs, and both hold stems without the need for glue.
Herbs
Whatever culinary herbs you have growing in the yard will go fine in your wreath. Gather these before you start, and remember its better to cut the stems a little long. You can always trim off any excess as you make the wreath. For safety reasons, I don’t include non-culinary herbs on a culinary wreath, even as accents.
If you don’t have culinary herbs growing in your yard, you can still make this wreath with herbs purchased from the grocery store or a farmers market. Herbs that make good bases are sage, rosemary, oregano heads, bay leaves, Herbs that are good as accents include rosemary, rose hips, thyme, and oregano heads. The herbs you actually use in cooking are the ones that should go into the wreath.
Ornaments
I chose to leave my wreath unadorned, but you might want to add ribbons, beads, craft birds, and many other decorations could be added to beautify the wreath. If you intend to use the herbs in the wreath for cooking, you’ll want to bear that in mind when choosing ornaments. For instance, look for craft birds with wires on their feet so you can tie, rather than glue, them on.
Step Two: Add The Base Layer

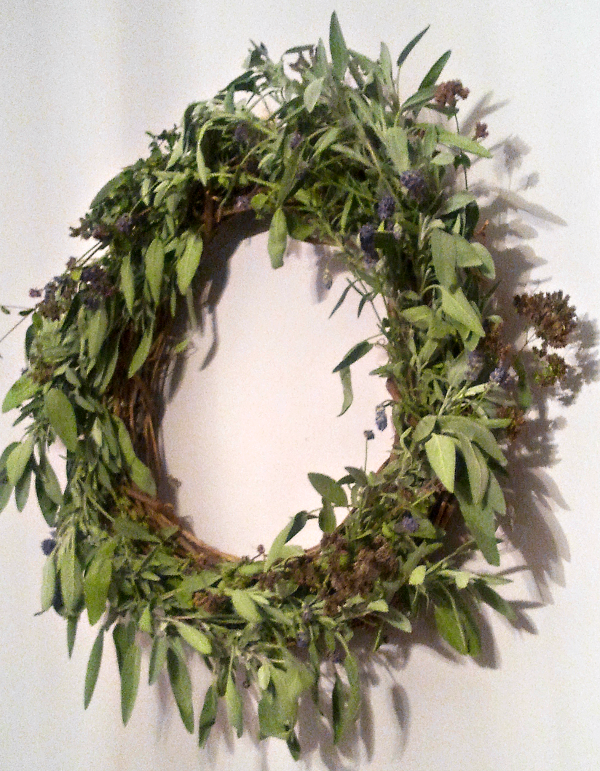
As you can see in this image, I just tucked my base layer of sage into the grapevine wreath form. Keeping the leaves pointing in one direction, work all the way around the form. Make the base layer nice and full, but don’t overcrowd the leaves since your aim is to dry them.
Step Three: Add the accents

I gathered small bunches of lavendar and snipped the ends even, then threaded them into the form beneath the sage. I find that if the ends bend, it helps to snip them a little shorter. I also added oregano heads as an accent.
Step Four: Add Ornaments, if Desired
Gently wind ribbon or beads around the wreath, add craft birds and the like,
Step Five: Hang and Admire Your New Wreath
You can either use an over door wreath holder or a loop of string or ribbon to hang your wreath. Standing back and admiring your wreath is so fulfilling. And from now on, that beautiful scent will fill your home.
Previous Craft Article: Quick and Frugal Gazing Ball Stand
Note: The winner of my subscriber-only giveaway of a free copy of the My Memory Scrapbooking Suite software has been assigned. However, there could be a privacy issue with my naming a subscriber, even as a winner, so I’ll wait for permission.
Note: Purchasing items at Amazon.com through the affiliate links I provide benefits me and is a no-cost way you can support this site. I only link to products I use or would purchase myself.
Do you have any tips on making culinary herb wreaths? Which herbs do you like to cook with?
©by Janalyn Voigt

